All our themes is localized, which means it can easily be translated to your own language(easy but quite time consuming) using free plugin Loco Translate . Using this instruction you also should check and translate all plugins that are present in the theme .
If you want to use several languages at the same time, install plugin Wp multilang and create the necessary languages.
To translate it you need to follow these steps:
Check you can switch language
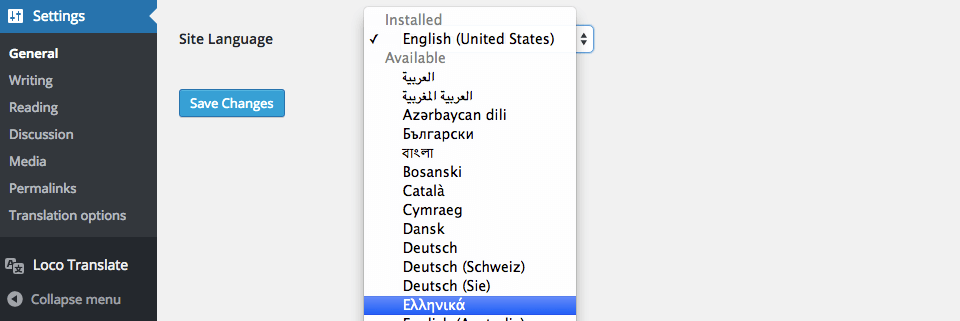
Head to the Settings > General admin screen and scroll to the bottom. You can see a dropdown list there with the label “Site Language”. Changing this you can set a new default language for all website visitors. Try it out and see something like this:

In our example, we set the language to Greek, listed under “Available > Greek” in the list. WordPress will download the necessary language packs for Greek language and then this entry moves to the “Installed” section.
If you cannot see your language in the dropdown list install the core language packs manually then.
Now, you can switch between languages.
Find the theme in the translation dashboard
Enable the Loco Translate plugin. If it has not been installed yet, do that now.
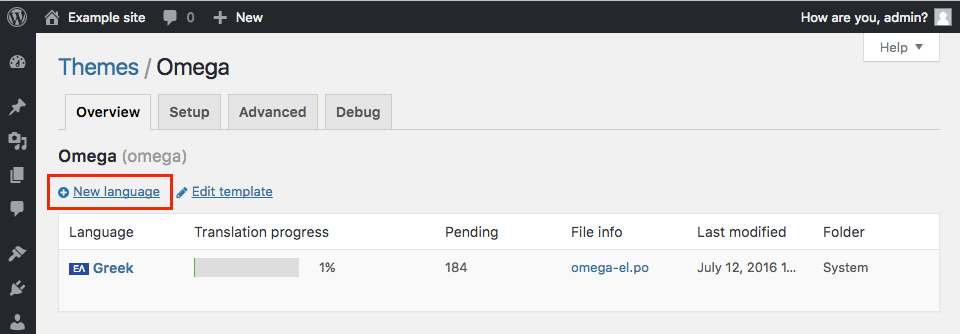
Go to the admin menu – section “Loco Translate” – select the “Themes” sub-section. It takes you to the list of all themes available in your WordPress. You can see Omega in the list whether it is active or not. Click on it and see the following screen:

Add a new language
Right above the language list section (might be empty) you can see a “New language” button with an add icon +. Click this button to start the translation, you will be forwarded to a new screen where you can choose your language.
Select a language from the dropdown list. In our case we select the Greek.

Select Custom to your new translations be safe from automatic updates.
Once the language and folder location have selected, click the “Start translating” button and you will be taken to the editor screen.
Translate
In the editor you see the strings that are defined in the template file. Strings that are not translated shown in bold blue.
The editor is quite intuitive. Select the string at the top and type your translation into the panel at the bottom, save it then.

For example, you have chosen to translate the phrase Leave a Comment. Use the text filter at the top of the editor to quickly find this phrase and select it in the list then. Type the text “[пример перевода]” into the bottom panel as your translation.
The star icon at the right of the translated string indicates that your changes have not saved yet.
When you finish your translation, click the Save icon in the toolbar. Well done, you have made your first WordPress translation.
Translation of the theme and theme plugins using Theme Autozone .